From priceless ancient texts and today’s pulp fiction novels, to school projects, personal journals, and treasured photo albums, bookbinding is the art of assembling pages into a cohesive and durable book, securing individual sheets of paper, often using thread, glue, or other binding materials, and encasing them in a protective cover.
Read on to find out how to start bookbinding, as well as discovering what you need for bookbinding. We’ll also let you know how easy it is to start a DIY bookbinding project of your own.
The Origins of Bookbinding

c.10th century Greek text (Credit: benedek via Getty Images)
The origins of bookbinding date back to ancient civilisations, where rudimentary forms of keeping related pages together emerged to preserve important texts and manuscripts.
Binding as a craft began with the codex format in the Roman Empire and evolved significantly in medieval Europe, where monastic scribes meticulously hand-bound illuminated manuscripts, creating masterpieces that were both artistic and functional. Indeed bookbinding has evolved significantly over the centuries.
Today, bookbinding is mostly automated, but the tradition continues with various methods.
The Types of Bookbinding

Artisan bookbinding (Credit: Oliver Rossi via Getty Images)
Exploring the different types of bookbinding reveals a fascinating array of techniques, each with a unique charm and utility. Case binding, often used for hardcover books, provides robust protection and a professional finish. In contrast, Coptic binding, with its exposed spine and intricate stitching, offers flexibility and a rustic aesthetic that dates back to the second century AD, while Japanese stab binding, known for its simplicity and elegance, is ideal for creating beautiful handmade journals and sketchbooks.
Whether you’re a seasoned expert or a curious novice, the world of DIY bookbinding offers endless opportunities to create personalised, handcrafted books that tell your unique story. Next, we’ll take a look at what you need for bookbinding.
The Tools of the Trade

Bookbinding workshop (Credit: Costantino Costa via Getty Images)
Starting a DIY notebook binding project is exciting, and with the right tools and materials, you can create your own beautiful handmade books. Here’s a basic list to get you started:
Tools
- Bone Folder: Used for creasing paper and making sharp folds. Many are traditionally made from animal bone but there are some excellent non-animal based products available.
- Awl: An awl is used to punch holes in paper and covers for stitching.
- Needle: A sturdy, large-eyed needle for sewing groups of pages (known as signatures) together.
- Ruler: A metal ruler is ideal for measuring and cutting straight lines.
- Cutting Mat: It protects your work surface and helps achieve precise cuts.
- Craft Knife: For cutting paper and trimming edges cleanly.
- Scissors: A pair of small household scissors is useful for cutting thread and smaller pieces of paper.
- Brush: This will ensure your glue is applied evenly.
Materials
- Paper: If possible, use high-quality, acid-free paper for the pages. You can use regular printer paper or speciality papers depending on your project.
- Thread: Most DIY bookbinding projects tend to use linen thread but any strong, waxed thread can be used for stitching your pages together.
- Glue: PVA glue is ideal for bookbinding due to its strong, flexible, and archival properties.
- Book Board: You’ll need a thick and sturdy board for your covers.
- Cover Material: How are you going to decorate your cover? You can use anything, including magazine cuttings, wallpaper, fabric, leather, or even your own artwork! The choice is yours.
- Endpapers: Lots of books use decorative or plain paper inside the covers to hide the edges of the cover material and give a stylish, finished look.
- Bulldog Clips: These are used to hold the pages and cover in place while the glue dries.
It’s important to note that the tools and materials you need for DIY bookbinding can vary based on the specific binding technique you choose, but with this list, you’ll have everything you need to discover how to start bookbinding and you can enjoy the process of creating something uniquely yours!
DIY Notebook Binding: A Step-by-Step Guide

DIY notebook (Credit: Melinda Podor via Getty Images)
The question ‘what is bookbinding’ has lots of different answers. Indeed binding books can be simple, or it can be incredibly complex, so here’s a very basic step-by-step guide to get you started.
Prepare the Pages
- Cut your paper to the desired size of your notebook pages. Make sure all pages are the same size.
- Fold each sheet of paper in half, using the bone/plastic folder to make a sharp crease. Group several folded sheets together to form signatures (usually 3-5 sheets per signature).
Prepare the Covers
- Cut two pieces of book board to the same size as your folded pages. These will be your front and back covers.
- Cut your decorative paper or fabric slightly larger than the book board pieces (about 2.5 centimetres / 1 inch extra on all sides).
Assemble the Covers
- Apply PVA glue to one side of a book board piece and attach it to the centre of your cover material. Press down firmly to remove any air bubbles.
- Fold the edges of the cover material over the book board and glue them down. Use the bone/plastic folder to make neat corners. Repeat for the second cover.
- Cut two pieces of endpaper slightly smaller than the covers. Glue one piece to the inside of each cover, hiding the folded edges of the cover material.
Punch Holes
- With a ruler, mark evenly spaced points along the folded edge of each signature and the covers. Typically, 4-6 holes are enough.
- Use the awl to punch holes through the marked points on the signatures and covers.
Sew the Signatures
- Cut a length of thread about three times the height of your notebook. Thread your needle and knot the end.
- Start sewing from the inside of the first signature, going through the first hole. Continue weaving the needle in and out of the holes, attaching the signatures together. Use a simple stitch pattern like the pamphlet stitch.
- Sew the covers onto the first and last signatures using the same stitch pattern.
Finish the Notebook
- Cut a length of thread about three times the height of your notebook. Thread your needle and knot the end.
- Start sewing from the inside of the first signature, going through the first hole. Continue weaving the needle in and out of the holes, attaching the signatures together. Use a simple stitch pattern like the pamphlet stitch.
- Sew the covers onto the first and last signatures using the same stitch pattern.
Finishing Touches
- Use a craft knife to trim any uneven edges of the pages, if necessary.
- Open and close your notebook to ensure it functions smoothly.
Congratulations! You’ve done your first DIY bookbinding project! Enjoy the satisfaction of using a notebook crafted by your own hands or gift it to someone special.
Making Memories: The Joy of Bookbinding
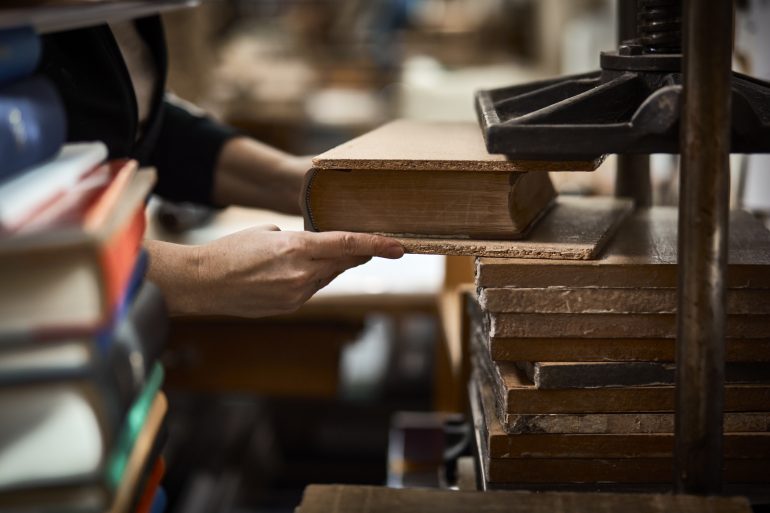
Bookbinding press (Credit: Oliver Rossi via Getty Images)
Bookbinding is more than just a craft. It’s a journey into the heart of creativity and tradition. Whether you’re restoring a well-thumbed childhood favourite or making something new, knowing how to start bookbinding is a deeply satisfying experience.
With a few basic tools and a bit of practice, you can create beautiful, personalised books that will be cherished for years. So, why not embark on your own bookbinding adventure and discover the joy of bringing your literary visions to life?


