At first glance, the intricate designs and shimmering beads might seem like the domain of skilled artisans, but in reality, jewellery making for beginners is a delightfully accessible hobby that anyone can dive into.
While shop-bought jewellery undoubtedly has its charm, creating your own pieces not only offers a personal touch but is often more affordable, and more fun! For beginners, the journey often starts with simple yet elegant pieces – be it beaded bracelets, statement earrings, or dainty anklets. As confidence grows, so does the complexity and uniqueness of the designs.
In this article, we’ll answer the question ‘what do you need for jewellery making’ as well as giving you some great jewellery making ideas for beginners.
Jewellery for Beginners - Tools of the Trade

Tools and accessories for DIY jewellery. (Credit: Daria Bulgakova via Getty Images)
Embarking on this sparkling journey is not just about accessorising. It’s a fun, and immensely rewarding way to express yourself. Whether you’re seeking a new hobby, an avenue for artistic expression, or a unique gifting idea, jewellery making is a gem of an opportunity.
Making jewellery at home for beginners is an exciting endeavour. While the specific tools and materials you’ll need may vary depending on the type of jewellery you want to make, here’s a basic starter list.
Beads and Gems
Choose a variety of sizes, shapes, and colours based on the style you’re aiming for. You can start with simple glass or plastic beads and then move on to semi-precious stones or crystals as you become more confident and experienced.
Findings
These are the functional components used to finish and hold the jewellery piece together. Common findings include earring hooks, clasps for necklaces, bracelets and anklets, jump rings, headpins and eyepins and crimp beads.
Stringing Materials
Jewellery making for beginners requires quite a lot of equipment, and depending on your project, you might need beading wire, nylon thread or beading cord, elastic cord for stretch bracelets and even leather or suede cord.
Basic Tools
‘What do you need for jewellery making’ is a very common question, and at first, you can usually get away with using wire cutters or pliers from the household toolbox. But as you do more and more, you may want to invest in specialist tools such as –
- Round nose pliers for creating loops;
- Chain-nose or needle-nose pliers for holding small items and for opening and closing jump rings;
- Wire cutters to cut stringing materials and wire;
- Crimp tool for securing crimp beads;
- Bead board or mat for laying out your design before you start stringing.
Once you’ve gathered these basics, you can begin to experiment and explore. Over time, as you become familiar with different techniques and styles, you’ll likely expand your toolkit to cater to more specialised and advanced projects.
Storage and Organisation
Jewellery for beginners can be a bit fiddly with lots of small pieces so it’s a good idea to buy clear plastic organisers with small compartments that are perfect for sorting and storing beads, findings, and other small components.
Safety Equipment
When working with wires and sharp tools, please ensure you take the correct safety precautions in accordance with the manufacturer’s guidelines. This may include safety goggles and protective gloves as well as any other required items and equipment.
Jewellery Making Ideas For Beginners

Making jewellery using beads, pliers and other tools. (Credit: Indie Studios LLC via Getty Images)
Here are four beginner-friendly jewellery making ideas for beginners. As you become more familiar with the incredible amount of techniques and materials, feel free to add your own unique twist to each project, customising them to fit your personal style.
A Beautiful Bracelet

Hand crafted beaded jewellery bracelets. (Credit: SEYLUL06 via Getty Images)
Materials Required: Elastic cord, an assortment of beads (your choice of colours and sizes), scissors, and a dab of jewellery glue or clear nail polish.
Instructions
- Measure and cut a length of the elastic cord that fits comfortably around your wrist (or the wrist of the recipient) adding a few extra inches to tie the knot;
- String your beads onto the cord in a pattern you like;
- Once you’ve added the beads, tie the ends of the cord in a secure knot (or a couple of knots for added security);
- To ensure the knot doesn’t come undone, dab a bit of jewellery glue or clear nail polish on it. Once it’s dry, trim any excess cord;
- If you want to hide the knot, consider putting a crimp bead or knot cover over it in elastic bracelets.
Exquisite Earrings

Making jewellery earrings at home. (Credit: Daisy-Daisy via Getty Images)
Materials Required: Earring hooks, headpins, beads, round-nose pliers, and wire cutters.
Instructions
- Slide a bead onto a headpin;
- Using a pair of round-nose pliers, create a loop at the open end of the headpin above the bead;
- Cut any excess wire using wire cutters;
- Attach the loop to the earring hook;
- Repeat the above steps for the second earring.
A Pendant Necklace
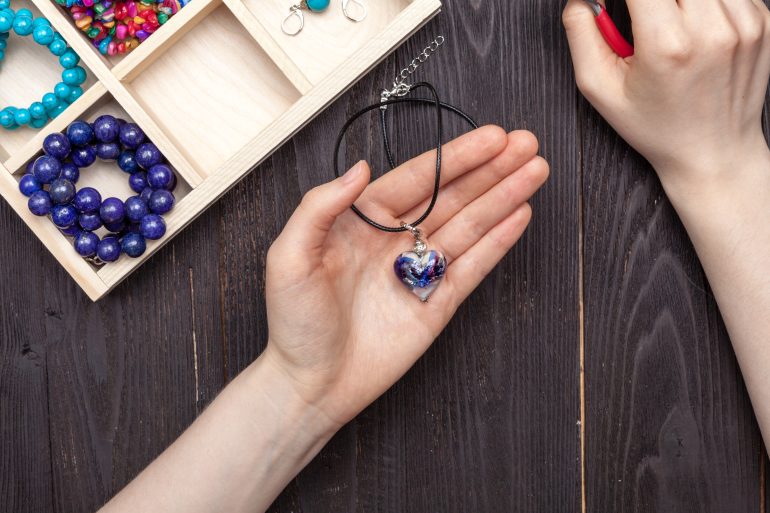
Making a pendant necklace at home. (Credit: AndreyCherkasov via Getty Images)
Material Required: A pendant (this can be a charm, a large bead, or even a button), jump rings, necklace chain, and pliers. This is one of the best things about making jewellery at home for beginners, the charm can be almost anything you want!
Instructions
- Open a jump ring using your pliers;
- Slide the pendant onto the jump ring;
- Slide the jump ring onto your necklace chain and close the jump ring securely;
- Add a clasp to the ends of the chain, or buy a chain that already comes with one;
- When you’re making the necklace, ensure that the jump ring’s thickness or diameter is suitable for the pendant and chain being used. A pendant with a small hole might require a thinner jump ring.
An Awesome Anklet

Crafting an anklet at home. (Credit: AndreyCherkasov via Getty Images)
Material Required: Chain (measured to fit your ankle or a good guesstimate of that of the recipient), an assortment of small charms, jump rings, lobster clasp, and pliers.
Instructions
- Decide where you want to place each charm on the chain;
- Use the jump rings to attach each charm to the chain;
- Once all charms are attached, secure a lobster clasp to the chain’s ends using small jump rings.
A Sparkle of Creativity
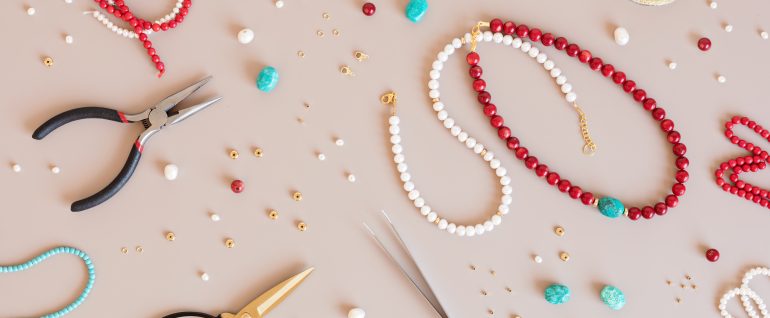
Various jewellery making tools, scattered. (Credit: netrun78 via Getty Images)
Jewellery making for beginners, while rich in technique and creativity, is as accessible as it is rewarding. Whether you’re crafting a simple beaded bracelet or experimenting with more intricate designs, each piece carries a personal touch and a fragment of your creativity.
Not only do these creations act as sparkling style statements, but they also embody moments of joy, and proud accomplishments. So, equip yourself with the basic tools, let inspiration guide you, and step into a world where every bead, every chain, and every pendant holds a story.
Remember, the beauty of making jewellery at home for beginners lies not just in the stunning end product, but in the joy of the journey itself. Happy crafting!


